JupyterHub
JupyterHub is an open-source, multi-user version of Jupyter Notebook for performing analysis of data in the VRE Core. More information can be found through the application documentation https://jupyter.org/.
JupyterHub must be configured on a project basis by the Platform Administrator. If JupyterHub has been configured for your project, data available in the VRE Core will be accessible to you for analysis in JupyterHub. Users may import Jupyter Notebooks for use in this environment but are reminded that the VRE Platform Terms Use prohibits any code or files containing personal information of data subjects from entering the VRE, including workbench tools, unless it has first been uploaded to the Green Room and approved by the Project Administrator for use in the VRE Core.
Jupyterhub is integrated with your VRE user account with Single Sign-On; no separate user account is required. To launch JupyterHub from the VRE Portal:
- Navigate to your Project Landing Page and click the Jupyterhub icon in the Left Sidebar, a new browser tab will open.
- Click Sign in with Keycloak to initiate your single sign-on session.
- Jupyterhub will spin up a new Notebook instance for each user.
- From the JupyterHub home page, you can now perform various actions such as opening a Python notebook or importing an existing Jupyter Notebook.
- When finished using JupyterHub, click Logout to end your session.
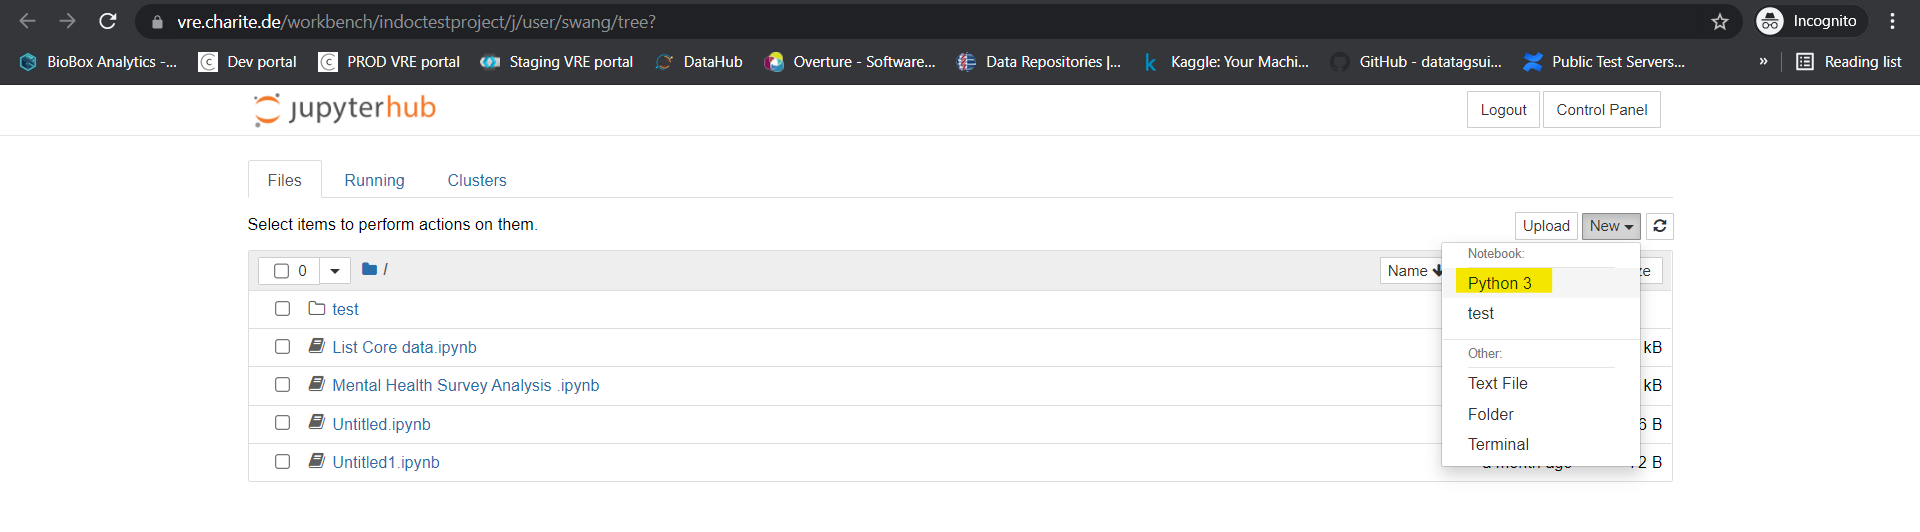
Create Notebook
Users can create a new Jupyter notebook with Python 3 inside Jupyterhub, and will have 10Gi storage under users' Home Directory.
Launching the Terminal
JupyterHub provides browser-based terminal access to advanced users if they need to run commands directly in the system shell (Ubuntu 18.04 is used by VRE to host Jupyter Notebook)

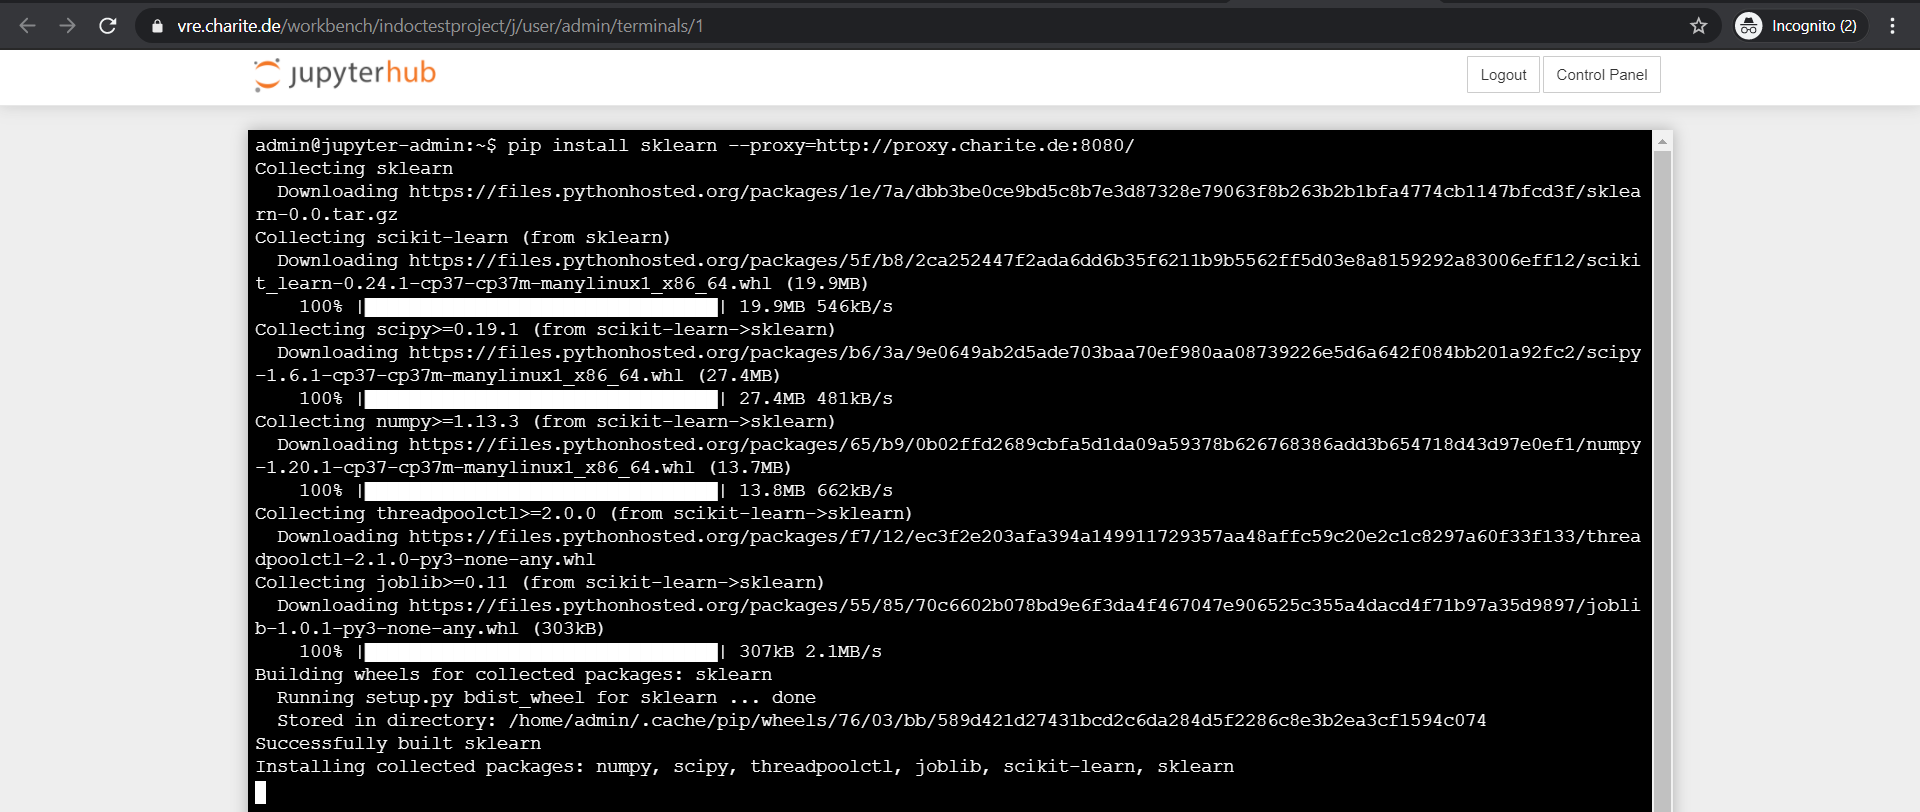
Installing New Python Packages
In compliance with Charité IT's policy, all outbound traffic must go through a proxy. This rule will require users to provide the proxy command line argument such as pip, curl, wget, etc.
pip install my_package --proxy=http://proxy.charite.de:8080/
If you are using conda to manage python packages, before running conda install xxx, you need to add this proxy config to ~/.condarc:
proxy_servers:
    http: http://proxy.charite.de:8080
    https: http://proxy.charite.de:8080
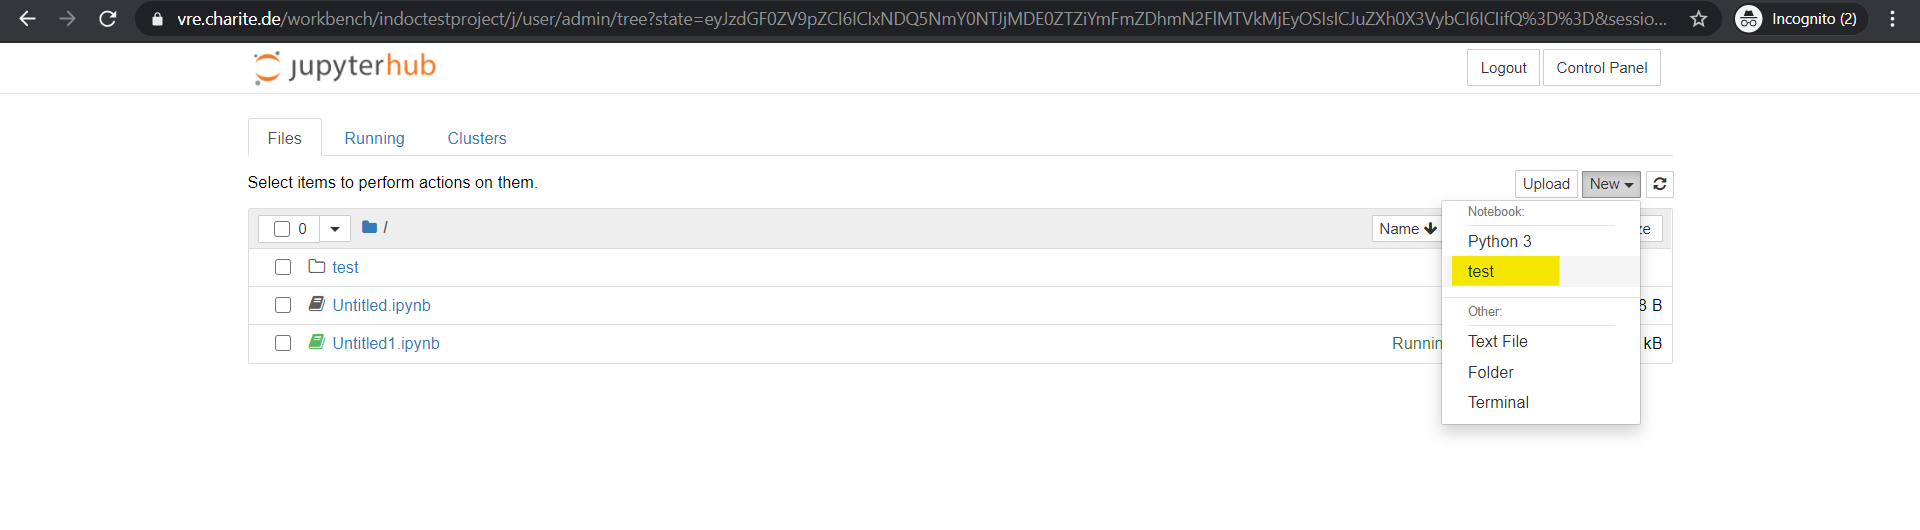
Creating a Python Virtual Environment and Registering a Kernel
python3 -m venv test
source test/bin/activate
##register a kernel in jupyter notebook
ipython kernel install --user --name=test

Launch VRE Command Line Tool in JupyterHub Terminal
VRE Command Line tool is deployed within JupyterHub Workbench so as VRE users can launch the tool to access to Project data for further analysis. Please visit this page: VRE User Guide/ Analyzing Data/Jupyterhub/Access to Project data in Jupyterhub using VRE Command Line Tool for details on:
- How to launch VRE Command Line Tool in Terminal
- How to be authenticated within VRE Command Line Tool
- How to perform file operations such as uploading/downloading Project Data within VRE Command Line Tool
If you have questions or suggestions about JupyterHub on VRE, please contact the Platform Administrator at vre-support@charite.de.
Set up analysis workflow in JupyterHub
The attached video jupyter-demo.mp4 demonstrates
- how data is copied from the core zone to the JupyterHub Workbench,
- how custom software is installed, and
- demonstrates a custom example analysis workflows including visualization.
See Also:

Copyright © 2022, Indoc Research. This work is licensed under a Creative Commons Attribution-ShareAlike 4.0 International License.